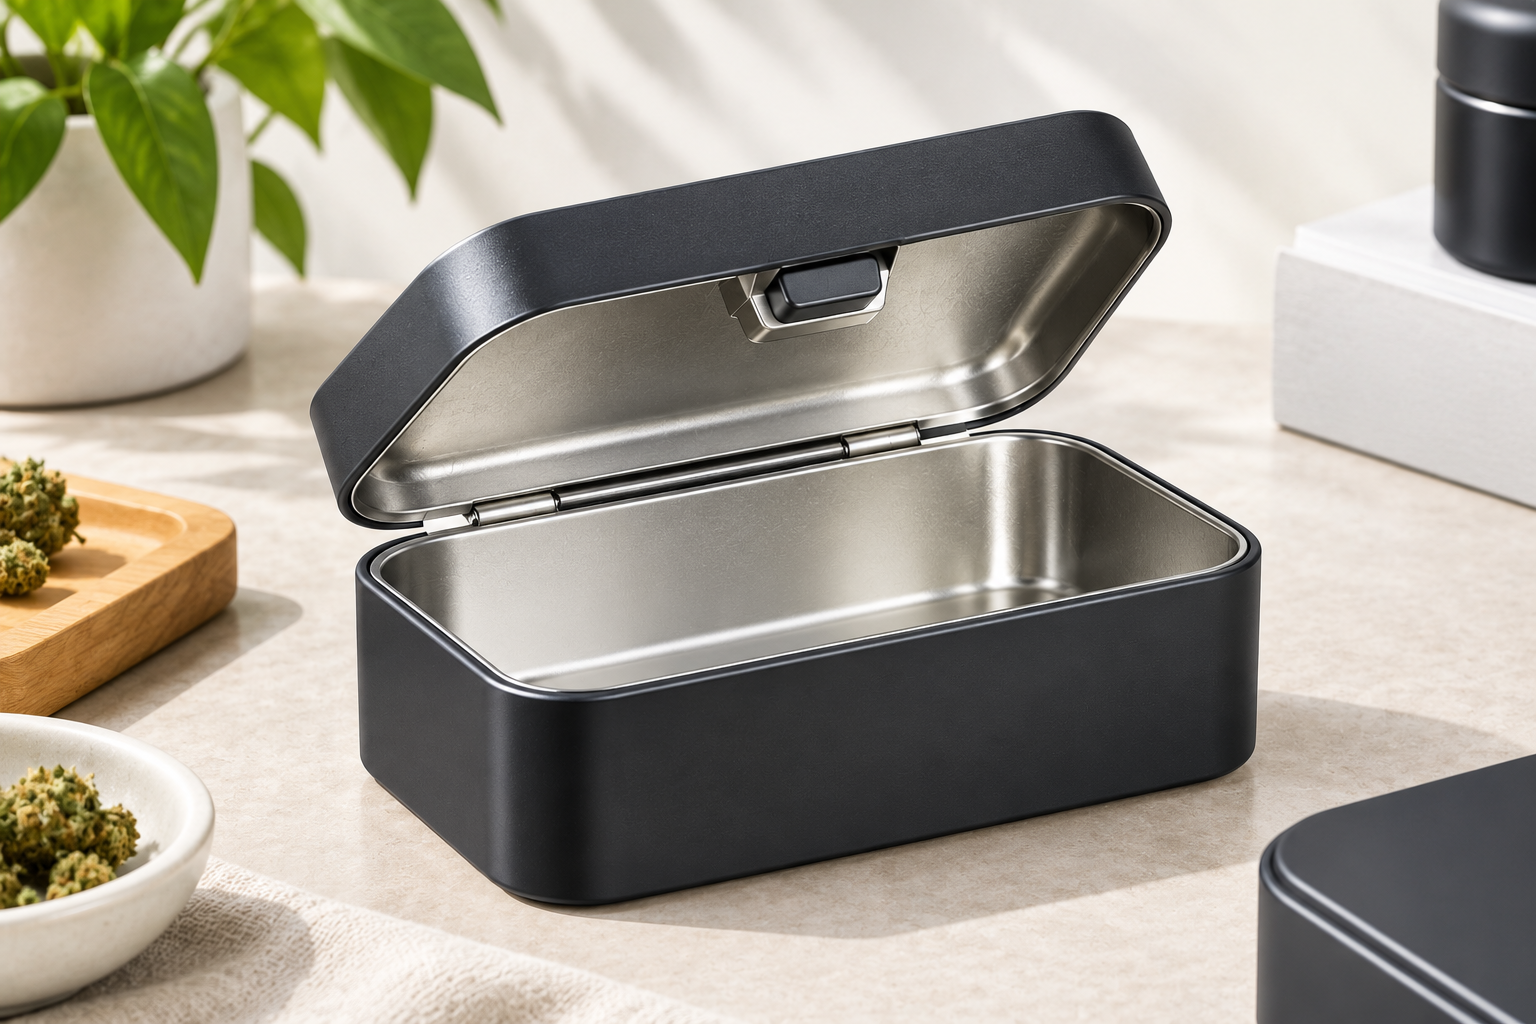
When developing a custom child resistant tin, the first step is not choosing a finished tin size. It is understanding the product that will go inside the package and the CR requirements the package needs to meet.
Product dimensions, quantity, arrangement, opening structure, insert requirements, target market, and testing standard can all affect the final tin design.
A common mistake is to select an attractive tin structure first and then discover that the internal space, lid movement, insert, or CR structure does not work with the product.
For custom projects, we recommend starting with the product and project requirements, then developing the tin structure around them.
For a broader overview of CR tin structures, testing considerations, and buyer responsibilities, see our guide to child resistant tin packaging standards, structures and selection.
What Can Be Customized on a Child Resistant Tin?
A custom child resistant tin can be developed around several packaging requirements rather than a single fixed dimension.
| Customization Area | What We Consider |
|---|---|
| Tin size | Internal product space and overall package dimensions |
| Tin shape | Square, round, rectangular, or other custom profiles |
| Lid structure | Lid opening, overlap, hinge and forming requirements |
| Anti-child-lock mechanism | Button position, opening movement and structural clearance |
| Insert | Product positioning, protection and removal |
| Artwork | Printable areas, seams, buttons and structural clearance |
| Surface finish | Matte, glossy, varnish, embossing and other effects |
The final structure should be developed after the product and CR requirements are confirmed.
How Should You Plan the Size of a Custom Child Resistant Tin?
The most useful starting point is the product itself.
Before discussing a final tin dimension, we normally need information such as:
- Product length
- Product width or diameter
- Product height
- Number of units per tin
- Product arrangement
- Preferred tin shape
- Insert requirements
- CR requirement
- Target market
- Testing standard, if applicable
Product orientation is also important. A product that fits horizontally may require a different internal layout when positioned vertically. The way the customer removes the product can also affect the usable internal space.
Why Product Size Does Not Equal Tin Size
The finished tin contains more than the product cavity.
The structure may require space for:
- Tin walls
- Rolled edges
- Lid overlap
- Hinge structure
- Anti-child-lock mechanism
- Insert material
- Product removal clearance
For this reason, there is no universal formula for converting product dimensions directly into a finished tin size.
Instead, the structure should be developed around the actual product and the required opening configuration.
Internal Dimensions vs. External Dimensions
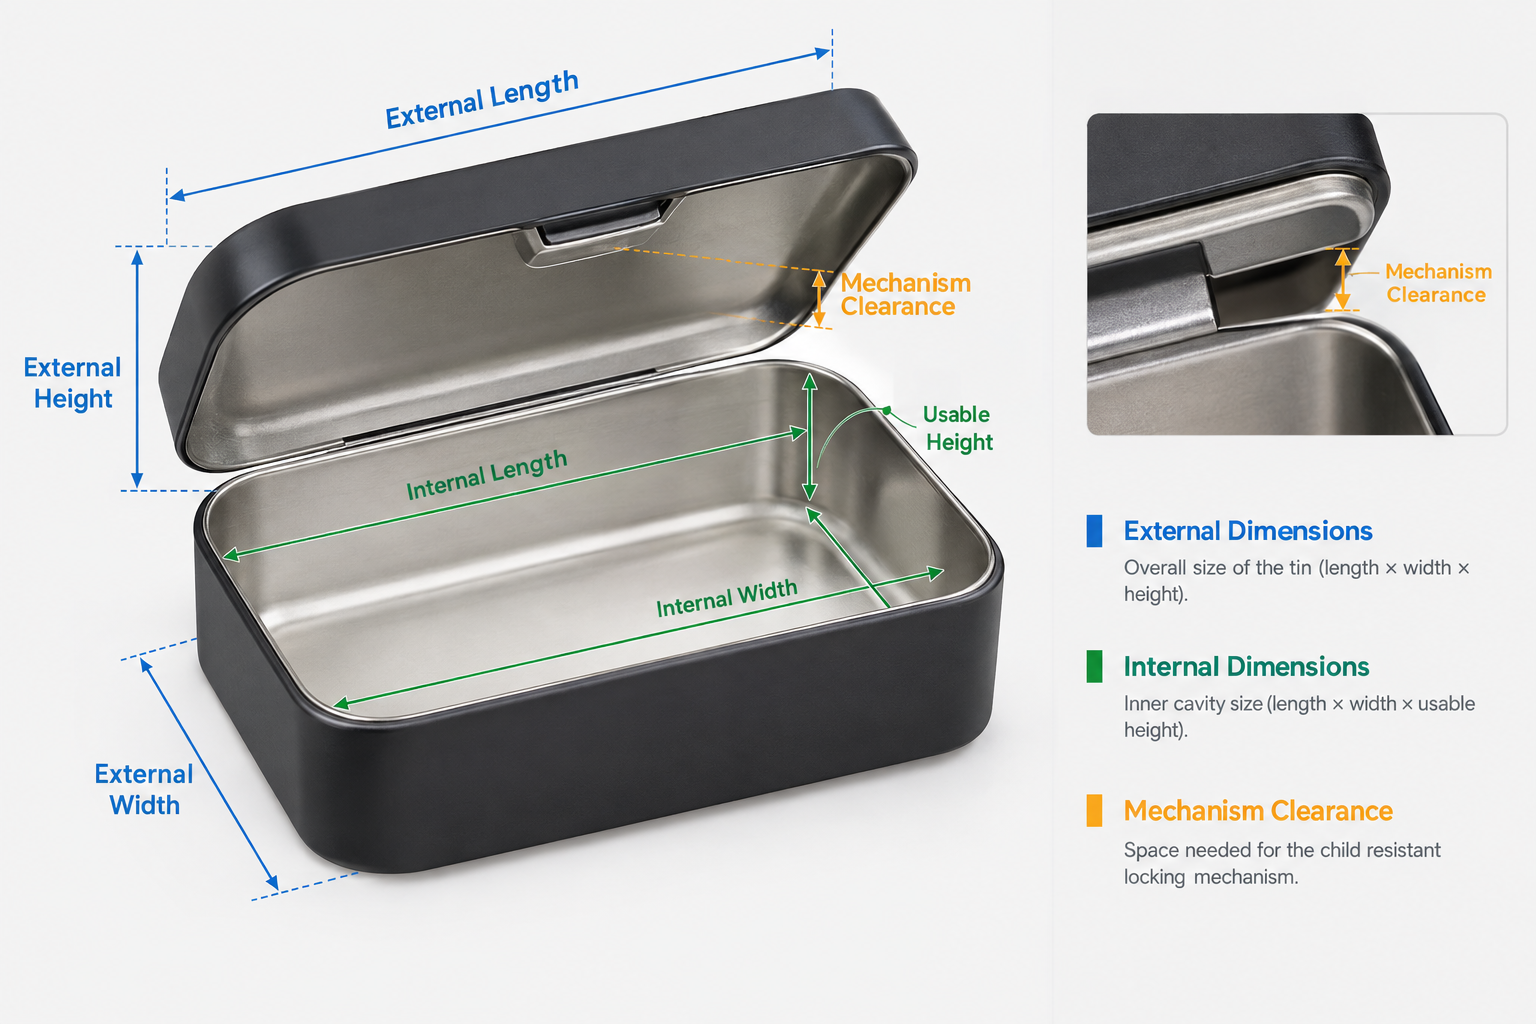
When discussing a custom CR tin, it is important to distinguish between external dimensions and usable internal space.
| Dimension | Purpose |
|---|---|
| External length | Overall outside length of the tin |
| External width / diameter | Overall outside width or diameter |
| External height | Overall outside height |
| Internal length | Usable length available for the product |
| Internal width / diameter | Usable width or diameter |
| Internal height | Vertical space available for product and insert |
| Mechanism clearance | Space required for the CR structure |
| Insert height | Space occupied by the internal insert |
The relationship between these dimensions depends on the tin structure, material, forming method, lid design, and insert configuration.
T-1030 Custom Child Resistant Tin Reference
Our T-1030 is a useful reference when discussing a flip-cover CR tin structure.
| Specification | T-1030 |
|---|---|
| Model | T-1030 |
| Material | Tinplate |
| Thickness | 0.23 mm |
| Size | Custom Size Accepted |
| OEM / ODM | Accepted |
| Shape | Customizable |
| Printing | Customized Printing |
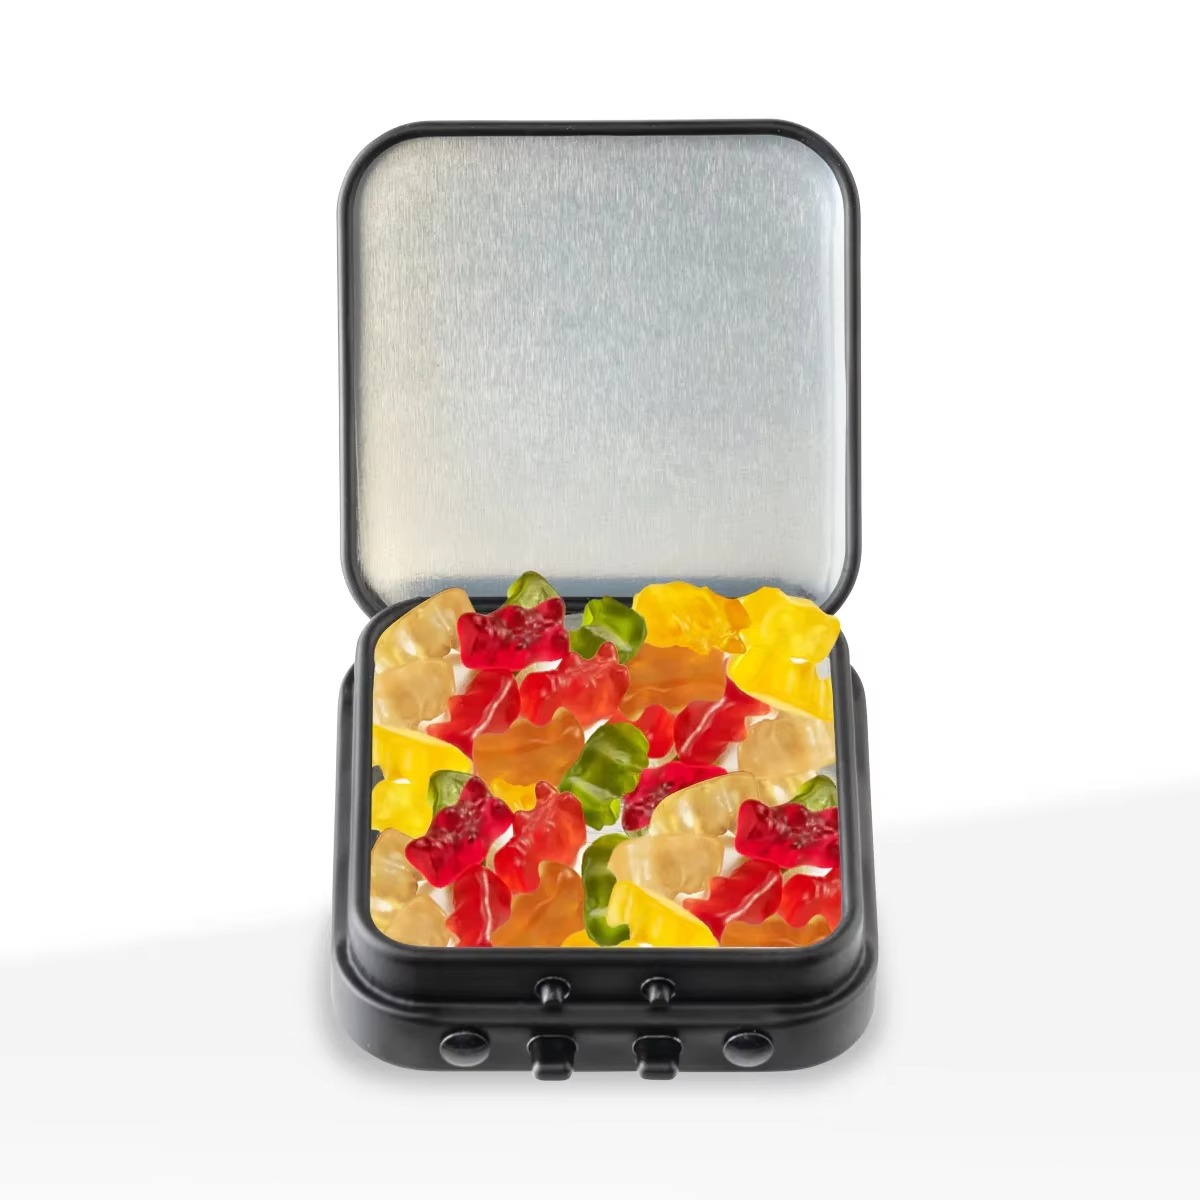
The product structure uses a flip cover with a button-style anti-child-lock mechanism. The tin can be customized according to the product and project requirements.
See the T-1030 flip-cover anti-child-lock CR tin product page for the current product specifications.
How Does the Anti-Child-Lock Mechanism Affect Tin Design?
The T-1030 structure uses a flip-cover design with a button-style anti-child-lock mechanism.
This structure needs to be considered during the early design stage because the mechanism can affect:
- Button position
- Hinge position
- Lid movement
- Internal product clearance
- Insert placement
- Printable areas
- Overall structural dimensions
The exact structural arrangement should be developed according to the product, required CR configuration, and intended testing requirements rather than assumed from a standard tin dimension.
Testing Status of T-1030
Our product information states that the testing scope and testing institute follow the client’s requirements, with TÜV and SGS among the testing institutes we normally work with.
However, we do not have a third-party test report for the listed flip-cover/button CR tin structure.
This distinction is important when evaluating a CR packaging project. A product structure and a third-party test result are not the same thing. The applicable testing requirements should be confirmed according to the target market, product, package configuration, and relevant testing standard.
Child Resistant Square Tin vs. Round Child Resistant Tin
Shape should be selected according to the product, internal arrangement, artwork, and usability rather than appearance alone.
Child Resistant Square Tin
A square CR tin can be practical when the product has straight edges or needs to be arranged in rows. The flat sides can also provide predictable areas for artwork and inserts.
You can also review our Square Tin Boxcan product range when considering a square structure.
Round Child Resistant Tin
A round structure can work well for products that suit a circular footprint or when the packaging concept requires a more compact visual form.
For a round CR tin, the product diameter, internal height, product arrangement, insert geometry, and lid movement should all be considered during development.
See our Round Tin Boxcan product range for related round tin structures.
Custom-Shape Child Resistant Tin
For an irregular or custom-shaped tin, the product footprint becomes even more important.
The development process should consider:
- Product shape
- Usable internal space
- Insert geometry
- Lid structure
- Anti-child-lock mechanism
- Manufacturing feasibility
- Artwork area
A custom shape should be developed from the product and structural requirements rather than simply modifying the outside outline of a standard tin.
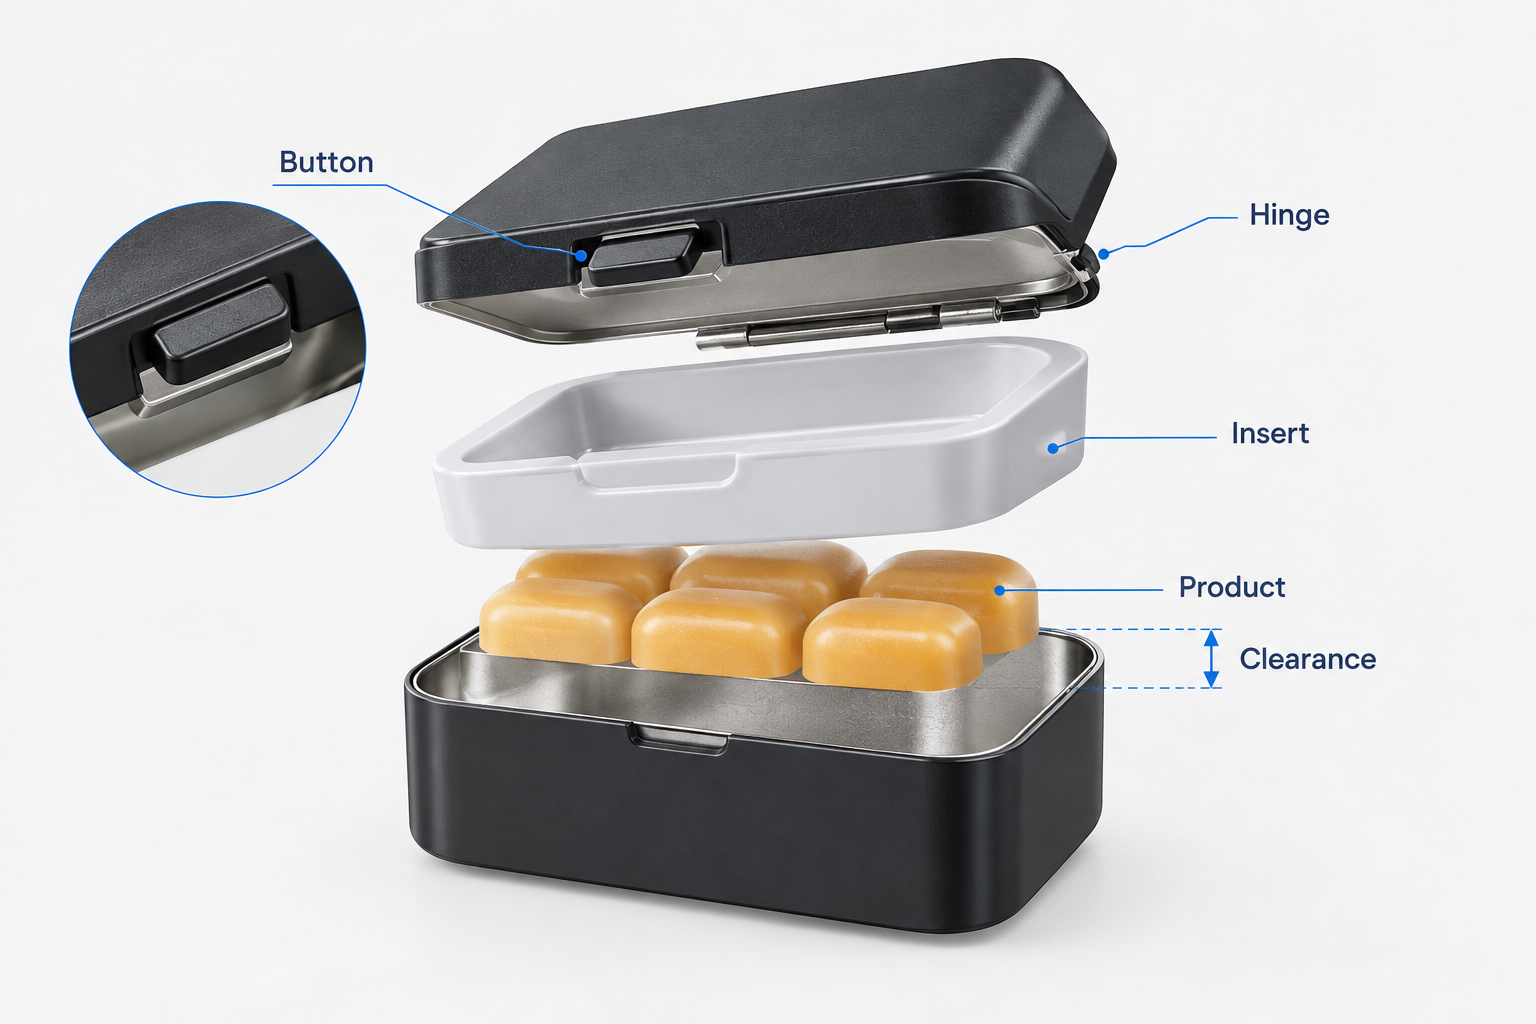
How Should Inserts Be Planned Around the Anti-Child-Lock Structure?
An insert can improve product positioning and presentation, but it must not interfere with the opening structure.
Depending on the product, inserts may use materials such as foam, sponge, EVA, PET, cardboard, paper, velvet, or formed trays.
The insert design should be checked against:
- Product height
- Available internal height
- Lid movement
- Button and hinge clearance
- Product removal
- Required presentation position
Insert Height
The insert occupies part of the available internal space.
Therefore, the design needs to account for the combined height of:
Product + Insert + Required Structural Clearance
The actual arrangement should be confirmed during structural development rather than estimated from the external tin height.
Product Access
The insert should also allow the user to remove the product without interfering with the CR opening structure.
The main considerations include:
- Finger access
- Product orientation
- Compartment size
- Number of products
- Removal direction
How Does the CR Structure Affect Artwork?
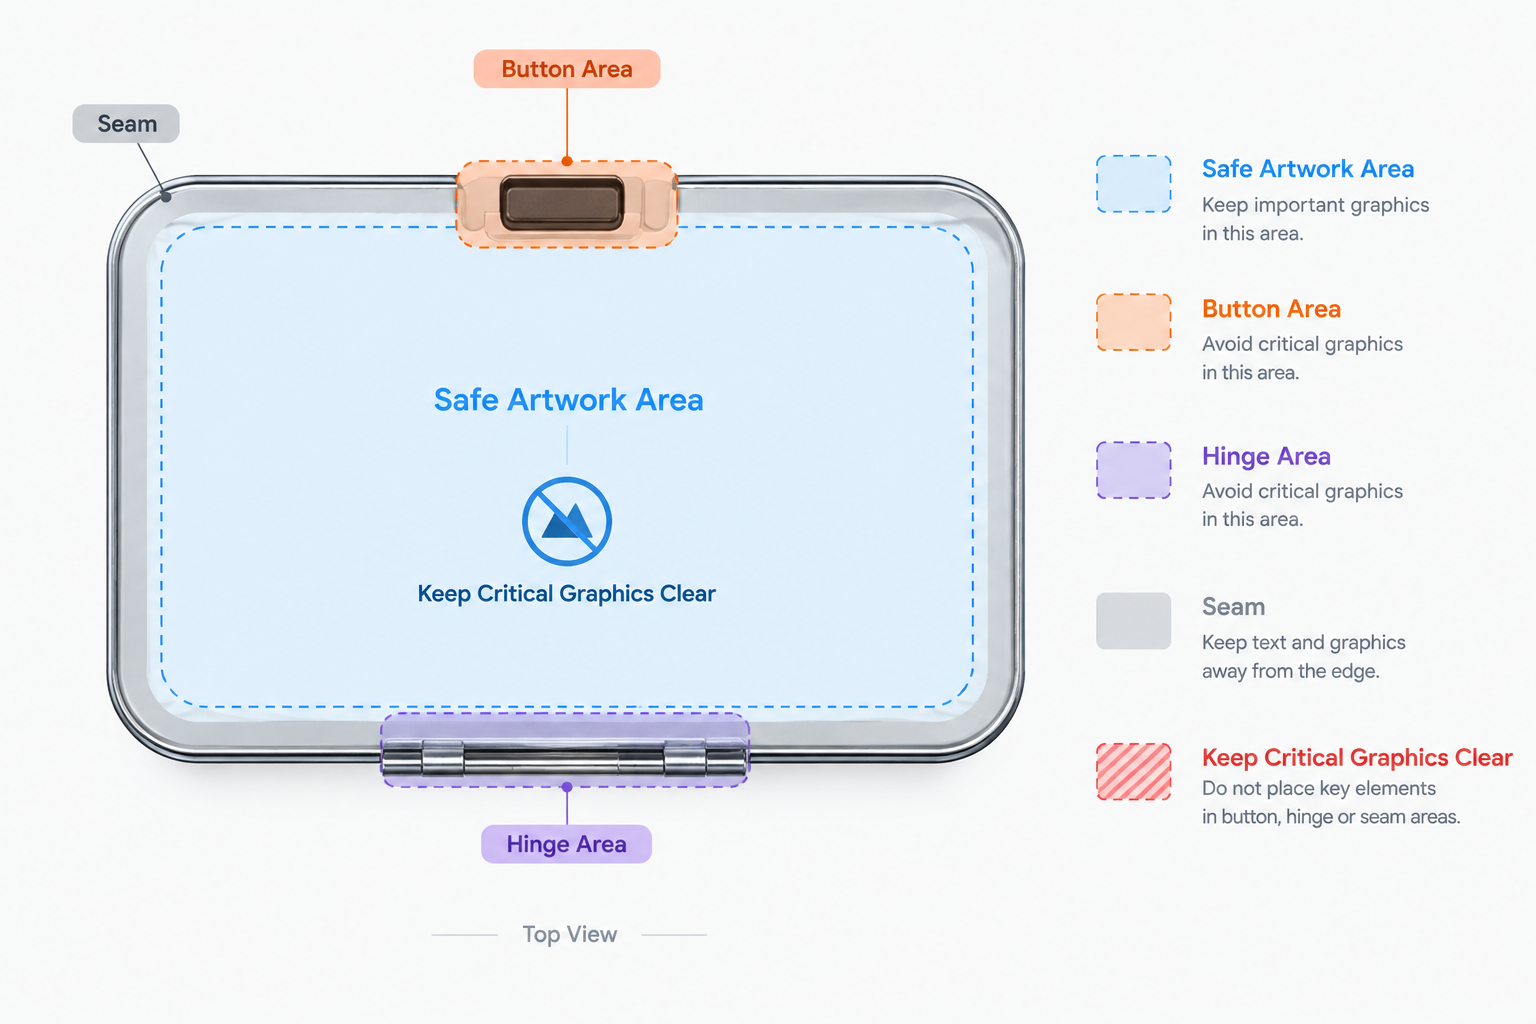
Artwork should be developed after the tin structure is confirmed.
For a CR tin, the artwork layout may need to account for:
- Button area
- Hinge area
- Lid overlap
- Seams
- Forming areas
- Structural edges
- Safe artwork areas
Important graphics, logos, text, and regulatory information should not be placed where forming or structural components could interfere with the final appearance.
The final artwork should therefore be prepared from the approved structural template rather than from an estimated flat rectangle.
For T-1030, our product information accepts common artwork formats including AI, PDF, EPS, CDR, and PSD.
For general information about tin printing, CMYK, Pantone, and surface finishing, see our guide to custom printed tin packaging.
Custom Child Resistant Tin Specification Checklist
Before structural development begins, it is useful to prepare the following information.
| Requirement | Information to Prepare |
|---|---|
| Product | What will be packed? |
| Product size | Length, width/diameter and height |
| Quantity | Number of units per tin |
| Arrangement | How the products should be positioned |
| Preferred shape | Square, round, rectangular or custom |
| Lid | Preferred opening or structural concept |
| CR requirement | Required CR function or specification |
| Insert | Protection, positioning or presentation requirements |
| Target market | Country or market where the package will be used |
| Testing | Applicable testing standard or required test scope |
| Artwork | Existing artwork, logo or packaging requirements |
You do not need to know the final tin dimensions before contacting us.
Product dimensions, quantity, preferred shape, CR requirement, target market, and testing standard provide a useful starting point for structural development.
What Happens After the CR Tin Requirements Are Confirmed?
A custom CR tin project normally develops through several stages:
Requirement → Structure → Prototype → Artwork → Testing → Production
1. Requirement
We review the product dimensions, quantity, arrangement, preferred shape, CR requirement, target market, and other project specifications.
2. Structure
The tin structure is developed around the product and required opening configuration.
3. Prototype
A prototype or sample can be used to review product fit, opening structure, insert position, and overall appearance.
4. Artwork
After the structure is confirmed, the artwork can be adapted to the actual printable areas and structural template.
5. Testing
Where testing is required, the applicable scope and testing institute should be confirmed according to the client’s requirements and target market.
6. Production
After the structure, artwork, sample, and required testing arrangements are confirmed, the project can proceed to production.
For new mold development and sampling, our current product information indicates a typical period of around 20–25 days, depending on the design.
What Should Be Confirmed Before Production?
Before production begins, the main points to review are:
Product Fit
Confirm that the product quantity, orientation, and dimensions work with the approved internal structure.
Mechanism and Lid Clearance
Confirm that the anti-child-lock mechanism, lid movement, hinge area, and product space do not interfere with each other.
Insert Compatibility
Check the insert material, thickness, product positioning, and removal method.
Artwork Clearance
Review the final artwork against the actual structural template, including buttons, hinges, seams, and forming areas.
Testing Configuration
If testing is required, confirm the target market, applicable testing standard, test scope, and testing institute before production.
FAQ
What information do I need to request a custom child resistant tin?
Start with the product dimensions, quantity, preferred shape, CR requirement, target market, testing standard, and insert requirements. Existing product drawings or artwork can also help us evaluate the project more accurately.
Should I provide internal or external dimensions?
For a new custom project, product dimensions are usually the most useful starting point. We can then develop the internal and external tin dimensions around the product, structure, insert, and CR requirements.
Can the insert affect the anti-child-lock structure?
Yes. Insert thickness and height can reduce usable internal space and may affect product positioning, lid movement, and structural clearance. The insert should therefore be considered during the initial structural development rather than added after the tin is finalized.
Request a Custom Child Resistant Tin Review
If you are developing a new CR tin, you can send us:
- Product dimensions
- Product quantity
- Preferred shape
- CR requirement
- Target market
- Testing standard
- Insert requirements
- Existing artwork or product drawing
We can use this information to review the packaging concept and determine the appropriate structural direction.
Request a custom child resistant tin review
Conclusion
A custom child resistant tin does not need to start with a finished tin dimension.
The more practical approach is to start with the product, quantity, preferred shape, CR requirement, target market, and testing standard. The internal and external dimensions can then be developed around the actual product and required structure.
The T-1030 provides one reference for a flip-cover tin with a button-style anti-child-lock mechanism. It uses 0.23 mm tinplate and supports custom size, shape, and printing requirements.
At the same time, the existence of a CR structure should not be treated as proof of third-party compliance. For the listed T-1030 structure, we do not have a third-party test report. Any required testing should therefore be discussed according to the target market, product, testing standard, and project requirements.